From Cloud to Curve to Grid
In the two previous examples, points are being produced through simple algorithms that involve mathematical functions. These functions produce points for a given counter i or j. It seems that the counter is responsible for producing the points. For example one of the algorithms that we used earlier is:
int x = i*2;
int y = j*2;
int z = (int)(50. * Math.cos(Math.PI/180. * (i * 6)));
points[i*height+j] = new MyPoint((double) x, (double) y, (double) z);
For the purpose of this exercise the counter was an integer number but that is not necessarily the case. It could be a double number with a 0.5 increment as in:
for(double j=0.; j<100; j+=0.5)
and therefore the points would be more close together (by half distance). With this rationale the counters can progress in infinitely small increments, but for our presentation we need to see them incrementing only by a finite distance. To produce a continuous line (that is a curve) out of these points, we need to connect the sampled points with small lines, in a way similar to the following figure:

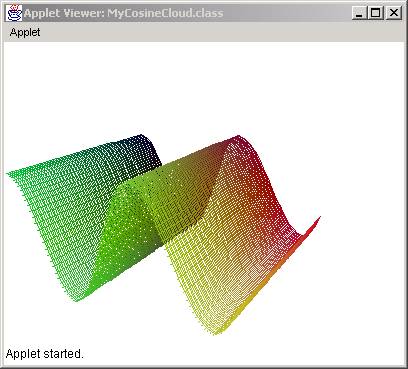
The smaller the gaps the more continuous the curve appears. The algorithm for creating curves that pass through each point in both x and y direction is shown below:
//*******************
public void paint(Graphics g){
offGraphics.setColor(Color.white);
offGraphics.fillRect(0, 0, 800, 600);
// *p1-----*pnext
// | |
// | |
// | |
// *pleft--*
for(int i=0; i<points.length-1-width; i++){
MyPoint p1 = new MyPoint(0.,0.,0.);
p1 = points[i].setPerspective();
int x1 = (int)(p1.x) + width+50;
int y1 = (int)(p1.y) + height;
MyPoint pnext = new MyPoint(0.,0.,0.);
pnext = points[i+1].setPerspective();
int xnext = (int)(pnext.x) + width+50;
int ynext = (int)(pnext.y) + height;
MyPoint pleft = new MyPoint(0.,0.,0.);
pleft = points[i+width].setPerspective();
int xleft = (int)(pleft.x) + width+50;
int yleft = (int)(pleft.y) + height;
offGraphics.setColor(points[i].color);
if((i+1)%width != 0)offGraphics.drawLine(x1, y1, xnext, ynext);
if((i+1)%width != 0)offGraphics.drawLine(x1, y1, xleft, yleft);
}
g.drawImage(offImage, 0, 0, this);
}
In the above algorithm we define as pnext the next point in the
array points. We also make sure we do
not exceed the end of the array so we loop from 0 to points.length-1. We also define as pleft the neighboring point on the left of a
point p. As we loop in the y-direction we make sure
that we not exceed the end row of the array so we loop from 0 to points.length-width. The combination of looping in both
directions constraint us to loop cumulatively from 0 to points.length-1-width.
In order to avoid drawing a line form the last point in the grid to the first one on the next row we use the statements:
if((i+1)%width != 0)offGraphics.drawLine(x1, y1, xnext, ynext);
if((i+1)%width != 0)offGraphics.drawLine(x1, y1, xleft, yleft);
The result of modifying the paint method through this algorithm is:
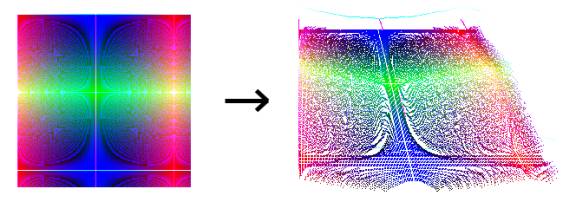
Predictability of Outcome
The objective of this section was to fill the points array using the result of a mathematical function. In some cases, we are able to predict the result of the algorithms but in other cases it is impossible and the resulting cloud is often surprising. The complexity of the algorithm is not necessarily an indicator of its unpredictability. As we saw in 2D mathematical images, we can create complex patterns with simple algorithms and vice versa we can create simple patterns through complicated algorithms.
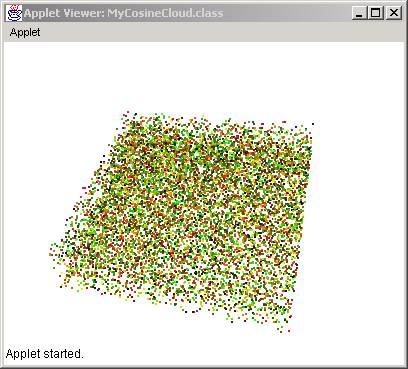
Random-generated Cloud
The simplest case of a mathematical function would be a random function. Here we assign a z height to be a random number between 0 and 50. We also create random numbers between 0 and 255 to create random colors. The source code would look like:
//*** fill the points array
for(int i=0; i<width; i++)
for(int j=0; j<height; j++){
int c1 = (int)(255. * Math.random());
int c2 = (int)(255. * Math.random());
int c3 = (int)(50. * Math.random());
points[i*height+j] = new MyPoint((double) i*2, (double) j*2,
(double) c3);
points[i*height+j].setColor(new Color(c1, c2, c3));
}
and the resulting cloud would look like this:
Redraw Speed Optimization
One of the main drawbacks of any 3D modeling system that displays the output through real-time movement is the lack of speed. As the amount of complexity increases, the speed of redrawing the screen become slower and slower. In our case we are redrawing thousands of points every split of the second that the mouse is dragged. This is done through the following method:
for(int i=0; i<points.length; i++){
points[i].rotatex(xoff*Math.PI/180);
points[i].rotatey(yoff*Math.PI/180);
}
which is part of the mouseDrag method. This method in turn calls the rotatex and rotatey methods in the MyPoint class:
//*************
public void rotatey (double angle) {
//Rotates point around y-axis
double newx = x * Math.cos(angle) + z * Math.sin(angle);
double newz = z * Math.cos(angle) - x * Math.sin(angle);
x = newx;
z = newz;
}
As we can see in the above method, we are calling the Math methods four (4) times. But we can do that only twice as in the following modification:
//*************
public void rotatey (double angle) {
//Rotates point around y-axis
double sin = Math.sin(angle);
double cos = Math.cos(angle);
double newx = x * cos+ z * sin;
double newz = z * cos- x * sin;
x = newx;
z = newz;
}
Such a modification seems to speed up twice the whole process.
We can improve the speed even further by calculating the sine and cosine before we call the rotate methods:
//*************
public void rotatey (double sin, double cos) {
//Rotates point around y-axis
double newx = x * cos+ z * sin;
double newz = z * cos- x * sin;
x = newx;
z = newz;
}
because we calculate them in the main code:
double sin = Math.sin(xoff*Math.PI/180);
double cos = Math.cos(xoff*Math.PI/180);
for(int i=0; i<points.length; i++){
points[i].rotatex(sin, cos);
points[i].rotatey(sin, cos);
}
The result is a much more smooth movement.
Cloud Inter-formation
Coming soon.
MyFace Class
So far we have dealt only with points and clouds of points. We also showed ways to make continuous curves out of discrete points. However, it is impossible to create so many points that we allow us to get the feeling of solidity, of mass. Instead we will simulate mass and its properties by using the features of a computer screen (that is pixels and colors). We will define therefore a new class called MyFace:
public class MyFace {
int numPoints;
MyPoint[] points;
//********************
public MyFace(MyPoint[] inPoints){
numPoints = inPoints.length;
points = new MyPoint[numPoints];
for(int i=0; i<numPoints; i++)
points[i] = new MyPoint(inPoints[i].x,inPoints[i].y,inPoints[i].z);
}
}
So as we can see the class MyFace needs just an array of points. So the constructor gets just an input array, which we use to fill out the points member array. After we construct a face we need to transform in 3D. But since it is composed of MyPoints and we already have defined all the transformation methods for them we can transfer the job straight to them. That is, we create move, scale, and rotate methods that transfer their job to the MyPoint class methods:
//********************
public void move(double xoff, double yoff, double zoff){
for(int i=0; i<numPoints; i++)
points[i].move(xoff, yoff, zoff);
}
//*******************
public void rotatex(double angle){
for(int i=0; i<numPoints; i++)
points[i].rotatex(angle);
}
//*******************
public void rotatey(double angle){
for(int i=0; i<numPoints; i++)
points[i].rotatey(angle);
}
//*******************
public void rotatez(double angle){
for(int i=0; i<numPoints; i++)
points[i].rotatez(angle);
}
The last thing we need to do to complete the MyFace existence is to draw it on the screen. We therefore define a method called draw and we pass it the Graphics from the main code. Then we use the Polygon object to draw the array of MyPoints, after we project them. Here is the code:
//********************
public void draw(Graphics g){
Polygon poly = new Polygon();
for(int i=0; i<numPoints; i++){
MyPoint p = points[i].setPerspective();
poly.addPoint((int)p.x, (int)p.y);
}
g.drawPolygon(poly);
}
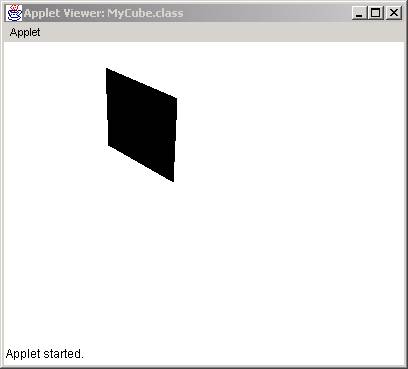
This completes the MyFace class so the next thing we need to do is to call it from the main program. This means that we need to construct a face from points and then draw and rotate. So our main code must be modified as follows (we comment out the previous code to show the changes):
import
java.applet.*;
import
java.awt.*;
import
java.awt.image.*;
public
class MyCube extends Applet{
MyPoint[] points;
MyFace face;
int xf, yf;
Graphics offGraphics;
Image offImage;
//**********************
public void init(){
offImage = createImage(800, 600);
offGraphics = offImage.getGraphics();
points = new MyPoint[4];
points[0] = new MyPoint(0.,0.,0.);
points[1] = new MyPoint(100.,0.,0.);
points[2] = new MyPoint(100.,100.,0.);
points[3] = new MyPoint(0.,100.,0.);
face = new MyFace(points);
//*** move to the center of rotation
/*old
for(int i=0; i<points.length;
i++)
points[i].move(-50., -50.,-50.);
*/
face.move(-50., -50.,-50.);
}
/**
*******************/
public void paint(Graphics g){
offGraphics.setColor(Color.white);
offGraphics.fillRect(0,0,400,
300);
offGraphics.setColor(Color.black);
/*old
for(int i=0; i<8; i++){
MyPoint p =
points[i].setPerspective();
offGraphics.setColor(points[i].color);
offGraphics.fillRect((int)p.x+100, (int)p.y+100, 3, 3);
}
*/
face.draw(offGraphics);
g.drawImage(offImage, 0, 0, this);
}
//************************************************
public boolean mouseDown(Event e, int x,
int y){
xf = x;
yf = y;
return true;
}
//************************************************
public boolean mouseDrag(Event e, int x,
int y){
int xoff = x - xf;
int yoff = y - yf;
/*old
for(int i=0; i<points.length;
i++){
points[i].rotatey(xoff*Math.PI/180);
points[i].rotatex(yoff*Math.PI/180);
}
*/
face.rotatey(xoff*Math.PI/180);
face.rotatex(yoff*Math.PI/180);
repaint();
xf = x;
yf = y;
return true;
}
}
The result is: