3D Studio Max
3D Studio MAX Animation
Basics
3D
Studio MAX (or 3dsmax) is a modeling, rendering, and animation program.
3DSMax
is divided into basic functions:
·
Create
(for creating solids, shapes, lights, cameras, warps, and systems)
·
Modify
(for changing the parameters of objects created
·
Hierarchy
·
Motion
(controls the animation parameters)
·
Display
(adjusting display parameters such as colors, hide/unhide, select, etc.)
·
Utilities
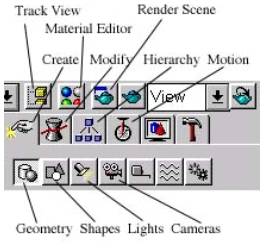
The
top bar menu (below) contains commands for selecting and changing objects in
the scene:
·
Select
allows one to click on an object and make it active
·
Region
determines the area of selection (rectangular, lasso, etc.)
·
Selection
filter allows one to select only categories of objects (geometry, lights,
cameras, etc.)
·
Select
by name allows to type or select from a list of names
·
Move
allows one to move object(s) (change their xyz position)
·
Rotate
allows one to rotate object(s) around a pivot point (see below)
·
Scale
allows one to scale object(s) around a pivot point (see below)
·
Pivot
is a point around which transformations occur (can be the centroid of each
object or the average)
·
X
Y Z XY YZ, ZX are directions along which transformations will occur
·

The
viewing parameters allow one to change the position of view:
·
Zoom
changes the distance of view
·
Pan
slides the viewer
·
Rotate
rotates the viewing position
When
using these tools the only thing that changes is the viewing position
The
xyz coordinates of the objects remain the same.
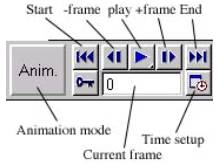
Time
is measured in frames. Shown below 100 is the total number of frames and 0 is
the current frame. By dragging the cursor allows the slider to slide along its
path showing one frame at a time and creating the effect of animation.

These
tools control the animation process. The video buttons control beginning, end,
play ff, and rwd. The time setup allows one to change the overall number of
frames and add or subtract more.
The
animation mode button when pressed becomes red and anything that happens in the
scene is recorded as change.
Creating a simple animation
·
Save
the model in formZ as 3DStudio.
·
Run
3DS Max and use Import... to read-in the .3ds file.
·
Create
a path (2d shape), a camera, and some lights (to illunimate the model)
·
Move
the path (shape) and make sure its where you want your camera to go.
·
Increase
the number of frames to 500.
·
Attach
the camera to the path:
·
Select
the camera
·
Select
the Motion section
·
Select
the Assign controller rollout then Position then the Assign Controller button
·
On
the pop-out window choose path and exit
·
On
the Path Parameters rollout select Pick Path and pick the 2d shape
·
Render
the scene (one frame initially to make sure everything is OK and then all
frames)
Creating a path
·
Goto
Create Shapes and uncheck the Start New Shape
·
Create
two or more closed shapes
·
When
done go to Modify, select Edit Spline and then choose Vertex on as the
Sub-object
·
Boolean
(union, intersect, difference) the two shapes( (splines):
·
Select
a boolean operation, then the first object then click the boolean button and
then the second object
·
Edit
the new path in space
·
Select
Vertex as the Sub-object
·
Select
the vertices you want to move
·
Choose
move from the main bar and move the vertices in space
·
Path
is ready to be assigned a camera
Creating combined movements
·
If
during the camera's move you want to also move the camera's target:
·
Go
to the frame you want the movement to start
·
Press
the Animate button (lower left)
·
Move
the target to the desired position
·
Uncheck
the Animate button
Remember:
·
Images
(640x480) are about 25K
·
Avi
flicks are about 1 MB per 100 frames (so 500 frames will be about 5 MB)
·
Production
time will vary (from 1 hour to 4) The more elaborate each frame is (shadows,
reflections, environmental effects) the more time it will take to render.
Fly- through in 3D studio max
To
create a fly-through one needs a model, a camera, and a path.
The
model can be imported from another modeling program, formZ for example. When
exporting in formZ make sure to turn the textures on.
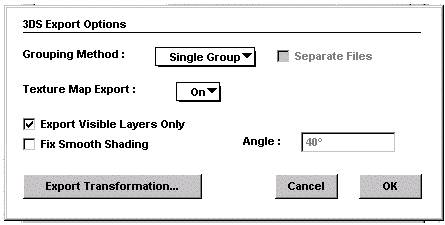
Also
have in mind that only texture maps are exported. Procedural textures are not
exported.
Note:
a procedural texture is a texture that is created through an algorithm, as
opposed to, through sticking an imagemap on a surface. For example, the brick
generation pattern in formZ is a procedural
texture.
After
importing the model in 3Dsmax you need to check if
1)
the
texture did go through and
2)
whether
the lighting conditions are correct.
Do
a rendering using the Render menu command and then adjust textures and
lighting.
When
you are happy with your model create a camera. There are two types of cameras:
a target and a free one. The target will always focus to a target whereas the
free will follow the path head-on. Choose the one you want.
Make
a path. Use the circle or line creation tool.
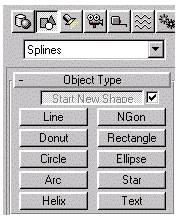
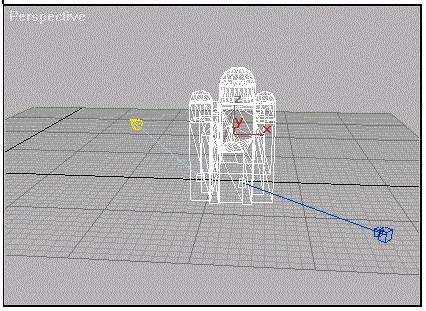
Create
a path (in this case a circle) and attach the camera to the path:
·
select
the camera
·
go
to motion folder
·
select
Assign Controller
·
Choose
the Position
·
Click
on the assign controller button
·
A
dialog box pops out. Select path.
·
Then
go down to the motion folder and select pick path.
·
Go
to the viewport and select the path.
·
Done.
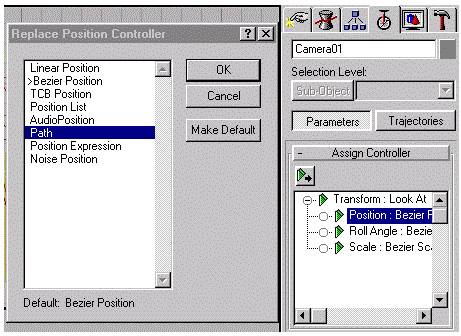
Your
viewport should look like this:
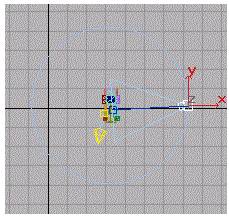
The
camera is positioned at the beginning of the path. Move the path up or down to
adjust the height of the camera. Use the Camera01 viewport to see what the
camera sees.
Open
the Track view. It is an icon that looks like this![]()
(above).
You
should be seeing the following window:
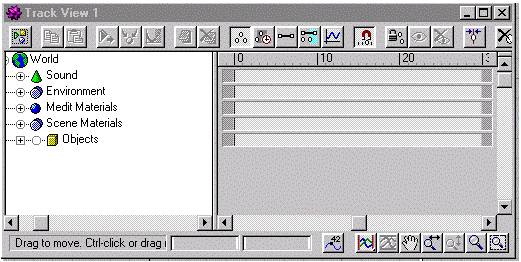
Read
the section Adjusting Speed in the class
notes for more on this device.
When
done with path and movement adjustments render a few frame positions to see if
what you expect is there. If things look OK then select the rendering menu and
choose render. Make sure all frames and that you are saving the .avi file to
some place on your disk Saving it locally (that is, C: or D:) may save you some
time. Only make sure that there is plenty of space on the local disk.
See
the avi information for more hints.
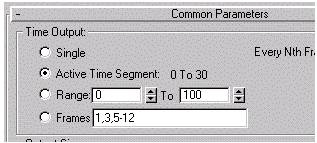
The
production of a clip and vary in time ad size depending of the complexity of
the scene and the number of frames. have in mind that a normal film speed is 60
frames per second. That means that 5 seconds require 5x60=300 frames. Each
frame (640x480) can be about 100K. Therefore the whole clip can be 100x300 =
30,000K or 30 MBytes.
Animation: Controlling
Speed
Problem: Camera (or object) is on a path and has to stop for a while and then
continue.
·
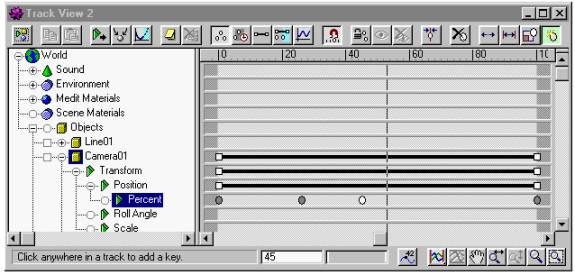
Open
the track view and set two key frames: one where it will start to stop and one
where it will resume speed.
·
·
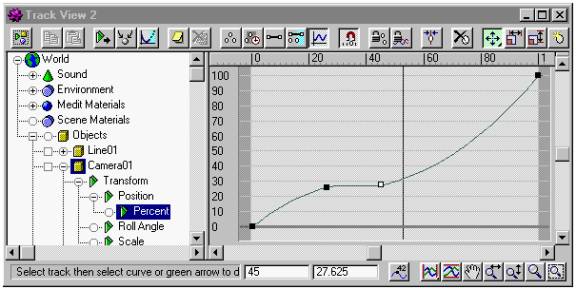
Then
change to the function curve mode
·
·
Bend
the curve at the key points till it become horizontal in-between. This
means that the speed will become 0 between these two times.
·
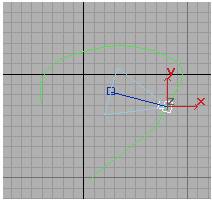
Check
the result:
·
The
camera (or object) moves, then stops, and then continues...
Animation: Expressions
Problem: Object (box) must rotate around other object (sphere) using
expressions.
·
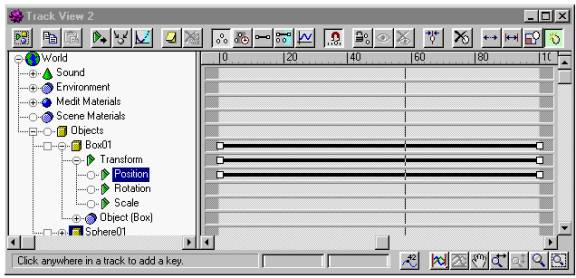
Open
the track view the parameter of the object to be changed.
·
·
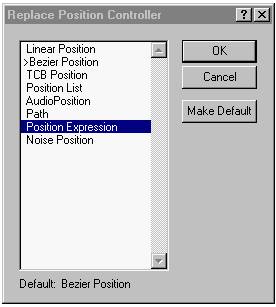
Assign
Position Expression to inform the system that this object will have an
expression associated
·
·
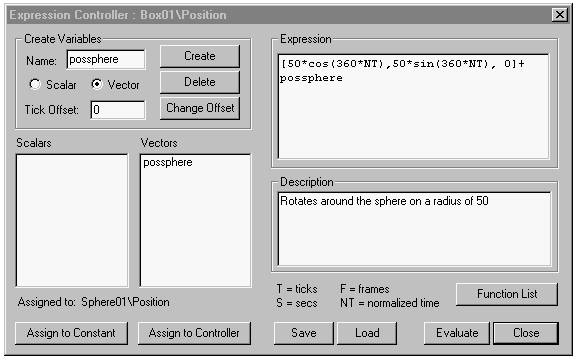
place
the cursor on the object's track and click on the left button (or select
properties). A window appears:
·
·
Create
a vector variable and call it possphere. Assign to it the position of the
sphere.
·
Type
in the Expression input area the expression. You can use any of the
predetermined functions and any new variable you create (i.e. possphere)
result: the box rotates around the sphere in a
50-point radius.